Add new assets on the SmEx: Smart Expense Manager
The first step, to open the Assets screen, click on “My Assets”

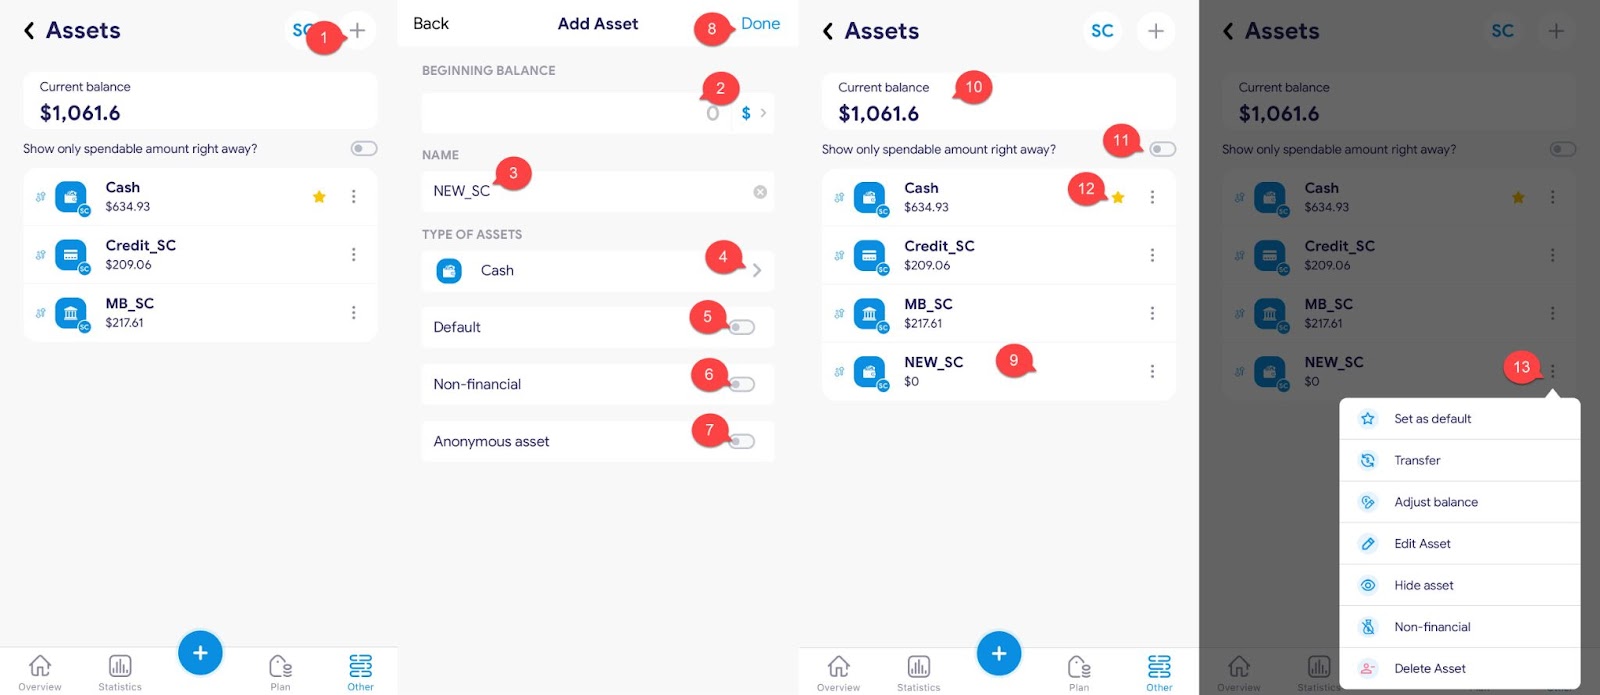
- Detailed steps to add new assets:

1. Press on the icon to add a new asset.
2. Add initialization balance.
3. Enter the name you want to give this property.
4. Click on the “>” icon and select the type of assets.
5. Select this asset as default. (Each user can only have 1 default asset which cannot be deleted, in case the user adds records without selecting an asset, the system will automatically update those records to the default asset).
6. Select this asset not to be used for income and expenditure. (For example, a car, a house, a saving, .. asset "Non - financial" is not selected as a "Default" asset).
7. "Anonymous asset". Details at: Anonymous assets on SmEx: Smart Expense Manager
8. Click "Done" to finish creating the asset.
9. Once completed, the asset shows up as the below image.
10. The amount in the “Current balance” is equal to the sum of the displayed assets.
11. When this toggle is enabled, assets that are “Non - financial” will be displayed, and “Current balance” will be updated accordingly.
12. The star icon represents the default asset.
13. Tap the three dots icon for quick access to existing assets:
- Set as default.
- Transfer: details at: Transfer between assets on SmEx: Smart Expense Manager
- Adjustment of balance: details at: Adjust asset balance on SmEx: Smart Expense Manager
- Edit asset.
- Hide asset.
- Non - financial.
- Delete asset.